Author: admin
Pi Hole – Not upgrading (pihole -up)
Recently Pi Hole issued an update to there web front end, unfortunately every time I ran the command pihole -up I was getting an error message:
Unable to find remote helper for 'https'I was struggling to find any help on the web about this error but stumbled on an old article regarding git cloning failing in a similar way, knowing that Pi Hole uses git I ran the following commands:
sudo apt-get remove gitand this command to re-install git and any missing components:
sudo apt-get install git-allAfter this I re-issued the command pihole -up and was successfully able to update it to the latest.
pi@pihole:~ $ pihole -up
[i] Checking for updates...
[i] Pi-hole Core: up to date
[i] Web Interface: update available
[i] FTL: up to date
Hey Presto!
Apple Homepod Mini – Stereo Pair
Apple Homepod Mini replacing Onkyo speakers.
Replacing my failing Onkyo receiver is no mean fault, but constant breakups in the sound was driving me nuts so I tried Apple Homepod Mini speakers in a stereo pair as my main consumption through Apple TV,
My testing in the speaker in a mono configuration I was impressed with it’s performance, but in a stereo pair lacked any volume or excitement, although everything seem clear the volume was very muted and until turning the volume to max did it bring any excitement. On top of this Apple don’t support the mini as an arc source from TV leaving the the only source to be discontinued Homepad in the the Apple TV.
At present I can only recommend the Homepod minis to small room or hallways, I’m hoping that in the coming future they re-introduce a replacement to out-going full fat homepod as at the moment the mini isn’t adequate.
BabelPod – Stream external audio to Airplay 2 speakers
Weekend Tech fun!
Credits to: Andrew Faden for BabelPod & mcfisto for Airtunes2
Stream music from Vinyl/MD/CD or Tape to Airplay speaker such as Homepod or Sonos.
To follow these instruction you will need a Raspberry Pi, imaged with raspian lite, cables to hook up your external audio source such as phono to 3.5mm jack for your on board jack with Raspberry Pi 3 – 4 or a USB sound card for the Raspberry Zero (USB Card can also work for all Raspberry Pi)
Once Raspian is installed expand the file system to use full sd-card (4gb will do) and enable SSH
When you have found the IP of your Raspberry Pi SSH on to it using Putty or Terminal
Run each of the following command line by copying and pasting:
$ wget https://nodejs.org/dist/v9.8.0/node-v9.8.0-linux-armv6l.tar.xz
$ sudo mkdir /usr/local/lib/nodejs
$ sudo tar -xJvf node-v9.8.0-linux-armv6l.tar.xz -C /usr/local/lib/nodejs
$ sudo mv /usr/local/lib/nodejs/node-v9.8.0-linux-armv6l/ /usr/local/lib/nodejs/node-v9.8.0
$ nano ~/.profileAdd the following lines to the bottom of profile and save and close by pressing ctrl and x
# Nodejsexport NODEJS_HOME=/usr/local/lib/nodejs/node-v9.8.0 export PATH=$NODEJS_HOME/bin:$PATH
Reload the changes just made by running the following command
source ~/.profileNext the important bit installing airtunes2 – this is needed for new Apple Devices
pi@raspberrypi:~/ $ git clone -b fix_port_0_error https://github.com/mcfisto/node_airtunes2.git
pi@raspberrypi:~/ $ cd node_airtunes2
pi@raspberrypi:~/node_airtunes2 $ npm install
pi@raspberrypi:~/node_airtunes2 $ cd ..
Next we install the web front end, this is used to control where your source music is played from and to
pi@raspberrypi:~ $ git clone https://github.com/maexdaemaege/babelpod.git
pi@raspberrypi:~ $ cd babelpod
pi@raspberrypi:~/babelpod $ npm install
pi@raspberrypi:~/babelpod $ node index.jsThe last command in the text file above should starts the program and all being well you should be able to goto any browser and goto http://ip.of.raspberrypi:3000 from there Chose the Input (Where you music is being played from) and Output the speaker of your choice, the volume slider at the bottom allow you to control the volume of that speaker.
Optional: Making BabelPod startup automatically when the Rasberry Pi boots up:
sudo nano /etc/systemd/system/babelpod.servicecopy the below text and Ctrl & x to save the file
[Service]# need to specify the full path to nodeExecStart=/usr/local/lib/nodejs/node-v9.8.0/bin/node /home/pi/babelpod/index.js StandardOutput=journal Restart=on-failure RestartSec=10 [Install] WantedBy=multi-user.target
Next time the Raspberry Pi reboots BabelPod will automatically start.
*Please note you will still need to choose the input and output when this happens.
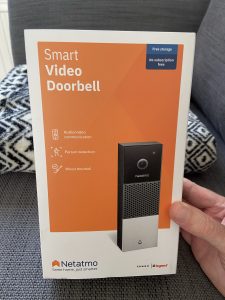
Netatmo Smart Video Doorbell – Review
My reason for choosing Netatmo Smart Video Doorbell over the other competition is that it has a wide compatibility with other eco systems and no hidden surcharges. Being an Apple user even today still limits you to devices that have full compatibility all round but when Amazon had a sale of this device I snapped it up – stock at the moment seem very erratic and im not sure if this is done on purpose or not – anyway I digress.
This door bell integrates with Apple and more importantly for me with the Apple TV, when a person rings the bell a notification comes on my TV and video is played, in addition to this my Homepod chimes and a notification with picture and video sent to my watch, perfect! and this all seem pretty responsive.
In the box you get:
Stickers to place on the property to disclose that people entering the property are being recorded however only one sticker is provided (not that anyone would use an ugly sticker)
Backing plate and angled bracket for different mounting options – ABS plastic 🙁
Template for drilling holes – although no spirit level like you seen on other youtube videos
SD Card pre-installed Great! (although mine again came with a smaller card than other reviewers)
Security screw and screw driver
Homekit badge to allow you to scan in to your Apple device
Chime adapter
Spare fuse
Raw plugs and mounting screws
What you don’t get:
Chime
Transformer
Clear instructions
This product claims to be easy to fit and as a single device it is, but wiring it up to a chime left me a little confused, they are examples of what the product is compatible with on the website ( https://check.netatmo.com/en-us/security/doorbell/question/requirement ) but the instructions still a little vague. So I decided to setup the doorbell off the wall before mounting.
I wired up the doorbell and straight away it came to life and a little light flashes green and you need to wait for this to turn white.
In the app you can then begin to setup the WiFi, here is where I ran into problems. My WiFi is setup for two networks my main WiFi and my IoT devices, I wanted my Doorbell to live in the IoT network – this hasn’t been a problem with my other Netatmo devices such as the Smoke Alarm but the Doorbell refused to connect.
However after several attempts and re-setting the device using the small reset button on the back of the device – it finally connected.
Next issue – WiFi strength.
My house uses the Ubiquiti WiFi with excellent coverage, however the device reports weak signal even though phones and other devices in the same place report excellent, I have tried all different channels, Signal strengths and my only solution was to install a second access point. This has improved the strength however I would say it might as well be hardwired as the AP is virtually next to the doorbell. I will continue to investigate and hope that this is just a firmware issue.
Quality:
The doorbell it self feels well engineered and the main button positive to the touch, you know where exactly where to press unlike some of the cheaper models, I was a little disappointed however in how the doorbell attaches to the angled bracket, only being held in place with small self tapping screws into abs plastic. Also the backing plate which is optional for installation but I used as it hides the bell wire better on my property isn’t very secure, I think this doorbell is really meant to be installed straight on a brick work where the cables pass directly behind it.
Video & Audio:
I have to say I’m happy with the quality of the video, my front door faces southwest so in the morning get sun light which can cause flares and the camera deals with this perfectly. Night vision is not bad also, however i have found the infrared lights flash which cause my other CCTV camera to pick up on, not sure why it flashes maybe power issue.
The audio is decent too, don’t get me wrong its no Sonos or Apple hompod quality but decent enough, the microphone does however pickup on wind noise which is distracting but clear other than that.
Other Issues:
Within the app you are given option to backup to an FTP server or Dropbox , this is a great feature as you know that you video is stored in two places if one fails and if you have Secure video from Apple a third place, again I was met with problems, FTP just would not work – tested with different clients to make sure that no fault of mine but it just would not work, but I’m glad to report Dropbox was a quick and easy option to setup.
Conclusion:
Would I buy the product knowing what I know: Yes its about the only option at the moment that ticks the boxes for me and I hope that the other issue can be worked out through software or firmware, I would say my overall opinion is I hope they bring out updated version which fixes my other concerns but other than that it is decent bit of kit.
Pros:
No Hidden surcharges
Local and Remote storage options
Compatible with other smart operators
Video Quality
SD-Card included
Homekit support
Responsive
If you loose power it continues to work for a little while as long as your wifi is still working
Cons:
Weak WiFi
WiFi Setup requiring several attempts
App a little clunky
Use with the angled bracket doesn’t feel as secure to the wall
Minecraft 1.17.1 BLS Shaders
Download and Copy the below zip file to C:\Users\ ( Your User Account)\Appdata\roaming\ .minecraft\shaderspack
New Weather Icon on Windows 10
Has your Windows 10 just updated recently and a New Weather Icon appeared on your task bar you didn’t ask for? Me too!!!
![]()
Here is two methods onto how to hide or remove it:
Firstly if you are not interested in removing the new feature you can simply right click on the taskbar and go to News and Interest and choose – Turn Off
But if you are like me and feel that the Windows 10 Bloatware is getting out of hand and turning into Windows 98 SE power tools disaster then here is a more permanent way to disable it (Install Linux – Lol)
Seriously if you are a bit handy with group policy you can disabled the feature fortunately by follow the below steps:
- Open gpedit.msc ( Group Policy Editor )
- Goto the following path: Computer Configuration -> Administrative Templates -> Windows Components -> News and interests
- Right Click onto Enable news and Interest on toolbar and choose Disable

- Click Apply and Okay and restart you PC
Hopefully the new ADMX template has been updated so that we can remove this from corporate domain.
New – Pi Hole Setup 2021
Heres a quick guide to my new Pi Hole setup and Block list.
Step One: Download Raspberry Pi OS Lite and extract to a 4GB SD Card (More Space the Better) I used Raspberry Pi own imager https://www.raspberrypi.org/software/
Step Two: Update the repositories using the command: sudo apt update
Step Three: Configure your Raspberry Pi with a static IP address: sudo nano /etc/dhcpcd.conf
uncomment the following lines and edit to suit your network
interface eth0
static ip_address=192.168.0.252/24
static routers=192.168.0.1
static domain_name_servers=192.168.0.1 1.1.1.1
Step Four: Install Unbound: sudo apt install unbound
Install DNS Root hits by running this command: wget https://www.internic.net/domain/named.root -qO- | sudo tee /var/lib/unbound/root.hints
Edit Unbound configure by using the following command: sudo nano /etc/unbound/unbound.conf.d/pi-hole.conf
Copy and paste the below text:
server:
# If no logfile is specified, syslog is used
# logfile: “/var/log/unbound/unbound.log”
verbosity: 0
interface: 127.0.0.1
port: 5335
do-ip4: yes
do-udp: yes
do-tcp: yes
# May be set to yes if you have IPv6 connectivity
do-ip6: no
# You want to leave this to no unless you have *native* IPv6. With 6to4 and
# Terredo tunnels your web browser should favor IPv4 for the same reasons
prefer-ip6: no
# Use this only when you downloaded the list of primary root servers!
# If you use the default dns-root-data package, unbound will find it automatically
#root-hints: “/var/lib/unbound/root.hints”
# Trust glue only if it is within the server’s authority
harden-glue: yes
# Require DNSSEC data for trust-anchored zones, if such data is absent, the zone becomes BOGUS
harden-dnssec-stripped: yes
# Don’t use Capitalization randomization as it known to cause DNSSEC issues sometimes
# see https://discourse.pi-hole.net/t/unbound-stubby-or-dnscrypt-proxy/9378 for further details
use-caps-for-id: no
# Reduce EDNS reassembly buffer size.
# Suggested by the unbound man page to reduce fragmentation reassembly problems
edns-buffer-size: 1472
# Perform prefetching of close to expired message cache entries
# This only applies to domains that have been frequently queried
prefetch: yes
# One thread should be sufficient, can be increased on beefy machines. In reality for most users running on small networks or on a single machine, it should be unnecessary to seek performance enhancement by increasing num-threads above 1.
num-threads: 1
# Ensure kernel buffer is large enough to not lose messages in traffic spikes
so-rcvbuf: 1m
# Ensure privacy of local IP ranges
private-address: 192.168.0.0/16
private-address: 169.254.0.0/16
private-address: 172.16.0.0/12
private-address: 10.0.0.0/8
private-address: fd00::/8
private-address: fe80::/10
Once the above text has been copied and paste save the file by pressing Ctrl + X and choose Y (Yes) to save.
Step 5: Install Pi Hole by running the following command:
curl -sSL https://install.pi-hole.net | bash
Setup is pretty simple nexting through the installation but when choosing an Up-Stream DNS provide select Custom and type in the following:
127.0.0.1#5335
This completes the first part of the installation, lets move onto AD List (Blocklist)
https://raw.githubusercontent.com/StevenBlack/hosts/master/hosts
https://raw.githubusercontent.com/PolishFiltersTeam/KADhosts/master/KADhosts.txt
https://raw.githubusercontent.com/FadeMind/hosts.extras/master/add.Spam/hosts
https://v.firebog.net/hosts/static/w3kbl.txt
https://raw.githubusercontent.com/matomo-org/referrer-spam-blacklist/master/spammers.txt
https://someonewhocares.org/hosts/zero/hosts
https://raw.githubusercontent.com/VeleSila/yhosts/master/hosts
https://winhelp2002.mvps.org/hosts.txt
https://v.firebog.net/hosts/neohostsbasic.txt
https://raw.githubusercontent.com/RooneyMcNibNug/pihole-stuff/master/SNAFU.txt
https://paulgb.github.io/BarbBlock/blacklists/hosts-file.txt
https://adaway.org/hosts.txt
https://v.firebog.net/hosts/AdguardDNS.txt
https://v.firebog.net/hosts/Admiral.txt
https://raw.githubusercontent.com/anudeepND/blacklist/master/adservers.txt
https://s3.amazonaws.com/lists.disconnect.me/simple_ad.txt
https://v.firebog.net/hosts/Easylist.txt
https://pgl.yoyo.org/adservers/serverlist.php?hostformat=hosts&showintro=0&mimetype=plaintext
https://raw.githubusercontent.com/FadeMind/hosts.extras/master/UncheckyAds/hosts
https://raw.githubusercontent.com/bigdargon/hostsVN/master/hosts
https://raw.githubusercontent.com/jdlingyu/ad-wars/master/hosts
https://v.firebog.net/hosts/Easyprivacy.txt
https://v.firebog.net/hosts/Prigent-Ads.txt
https://raw.githubusercontent.com/FadeMind/hosts.extras/master/add.2o7Net/hosts
https://raw.githubusercontent.com/crazy-max/WindowsSpyBlocker/master/data/hosts/spy.txt
https://hostfiles.frogeye.fr/firstparty-trackers-hosts.txt
https://hostfiles.frogeye.fr/multiparty-trackers-hosts.txt
https://www.github.developerdan.com/hosts/lists/ads-and-tracking-extended.txt
https://raw.githubusercontent.com/Perflyst/PiHoleBlocklist/master/android-tracking.txt
https://raw.githubusercontent.com/Perflyst/PiHoleBlocklist/master/SmartTV.txt
https://raw.githubusercontent.com/Perflyst/PiHoleBlocklist/master/AmazonFireTV.txt
https://gitlab.com/quidsup/notrack-blocklists/raw/master/notrack-blocklist.txt
https://raw.githubusercontent.com/DandelionSprout/adfilt/master/Alternate%20versions%20Anti-Malware%20List/AntiMalwareHosts.txt
https://osint.digitalside.it/Threat-Intel/lists/latestdomains.txt
https://s3.amazonaws.com/lists.disconnect.me/simple_malvertising.txt
https://v.firebog.net/hosts/Prigent-Crypto.txt
https://bitbucket.org/ethanr/dns-blacklists/raw/8575c9f96e5b4a1308f2f12394abd86d0927a4a0/bad_lists/Mandiant_APT1_Report_Appendix_D.txt
https://phishing.army/download/phishing_army_blocklist_extended.txt
https://gitlab.com/quidsup/notrack-blocklists/raw/master/notrack-malware.txt
https://v.firebog.net/hosts/Shalla-mal.txt
https://raw.githubusercontent.com/Spam404/lists/master/main-blacklist.txt
https://raw.githubusercontent.com/FadeMind/hosts.extras/master/add.Risk/hosts
https://urlhaus.abuse.ch/downloads/hostfile/
https://v.firebog.net/hosts/Prigent-Malware.txt
https://raw.githubusercontent.com/HorusTeknoloji/TR-PhishingList/master/url-lists.txt
https://blocklist.site/app/dl/youtube
Network Upgrade – Unifi USW-Flex Switch
With the warmer weather sitting outside in the Garden (Social Distancing applied) I noticed I was getting black spot’s where my WiFi strength wasn’t good enough. Unifi have recently launched a new 5 port out-door poe switch which was on sale at NETXL I managed to bag myself one with the plan to fit it in my garage to expand my poe ports and install an outdoor ap (UAP-FLEXHD).
The great thing about this tiny switch it takes power from your poe switch or injector and splits it across the 4 ports available, what wasn’t clear on Unifi website or datasheet is what type of poe it needed to work other than the latest 802.3bt/at poe++.
Seeing that the switch was at its cheapest in UK (£99) I snapped one up and tested with my current setup, My network runs Ubiquiti Edgemax POE-5 router (in switch mode) but nowhere could I find what type of poe it uses other than 47 volt.
The USW-Flex Switch will accept the following poe and will support up-to xx watts across the 4 port:
802.3af – 8 Watts
802.3at – 20 Watts
802.3bt – 46 Watts
And In my setup I was able to attach two G3-Flex camera no problem and when running used between 4-6 Watts adding the UAP-FLEXHD draws a maximum of 10 Watts so if you are planning to purchase one make sure your switch or injector is at least 802.3at.
Homebridge – Unifi Protect (G3-Flex Camera)
How to enable Unifi Protect to work with Apple Homekit using a Raspberry pi and the Homebridge application.
I was struggling to find the correct setting to enable Homebridge to connect to my Unifi Protect and G3-Flex camera’s. After alot of back and forth here are the working settings for ffmpeg.
{
“cameras”: [
{
“name”: “Camera Name”,
“motion”: true,
“videoConfig”: {
“source”: “-re -rtsp_transport tcp -i rtsp://Cloudkey URL:7443”,
“stillImageSource”: “-i http://xxx.xxx.xxx.xxx/snap.jpeg”,
“maxStreams”: 2,
“maxWidth”: 1920,
“maxHeight”: 1080,
“maxFPS”: 30,
“vcodec”: “h264_omx”,
“additionalCommandline”: “-preset slow -profile:v high -level 4.2 -x264-params intra-refresh=1:bframes=0”,
“mapvideo”: “0:1”,
“mapaudio”: “0:0”,
“audio”: false,
“debug”: false
}
}
],
“platform”: “Camera-ffmpeg”
}